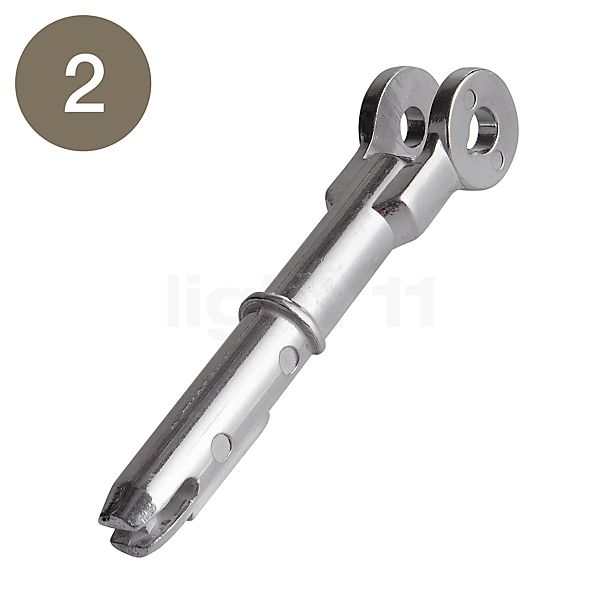
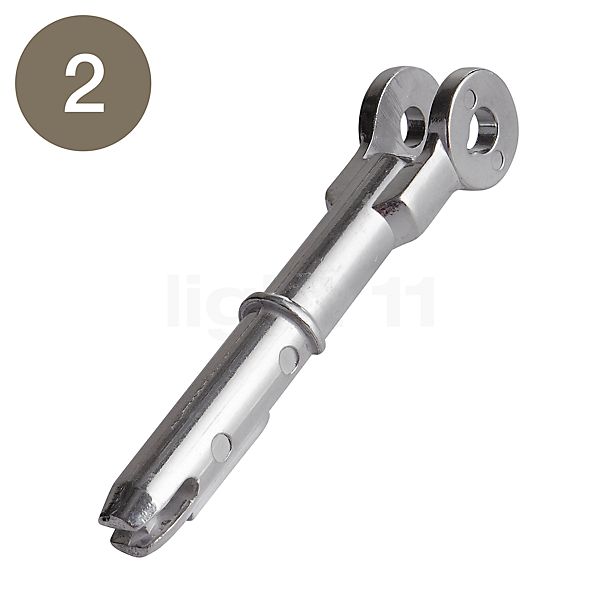
Replacement hinge including assembly instructions for Artemide Tolomeo floor lamps
In terms of popularity, the Tolomeo floor lamps are in no way inferior to the world-famous Tolomeo desk lamps. Neither are they in terms of quality: usually, the hinge No 14 has to be only rarely replaced. However, in case you might have accidentally knocked the reading light over, you can get the appropriate spare part here. The hinge No 14 can be used with the following versions of Tolomeo floor lamps:
• Artemide Tolomeo Mega Terra
• Artemide Tolomeo Lettura
• Artemide Tolomeo Basculante Lettura
• Artemide Tolomeo Basculante Terra
• Artemide Tolomeo Terra
• Artemide Tolomeo Mega Terra mit Schalter
• Artemide Tolomeo Mega LED Terra mit Tastdimmer
• Artemide Tolomeo Lettura LED
• Artemide Tolomeo Micro Terra
• Artemide Tolomeo Mega LED Terra mit Schnurdimmer
• Artemide Tolomeo Mega Terra Spezial Edition White mit Dimmer
• Artemide Tolomeo Micro Terra LED
• Artemide Tolomeo Mega Terra Special Edition Black mit Schalter
• Artemide Tolomeo Mega LED Terra Black mit Tastdimmer
• Artemide Tolomeo Mini Terra LED Tunable White
• Artemide Tolomeo Mini Terra LED
• Artemide Tolomeo Mini Terra
• Artemide Tolomeo Mega Terra Specia Edition Black mit Dimmer
• Artemide Tolomeo Basculante Terra doppio
• Artemide Tolomeo Terra LED
• Artemide Tolomeo Terra doppio
You can download a PDF with detailed and illustrated assembly instructions by clicking on this
link.
Note: all versions that were manufactured in 2010 and before require spare part No 8 in addition to the hinge No 14, which is to be found in this list of
spare parts. If you have any questions, feel free to contact our
customer service.
Required tools:
- large wrench (plumber wrench, water pump pliers)
- hammer
- penetrating oil, weapon oil or silicon spray
- small screwdriver (Philips)
- large screwdriver (slot)
Please note that the repairs described here are carried out at your own risk. In the case of any damage to the luminaire in the course of a non-expert repair, we assume no warranty. Due to the use of tools and the possibility of splintering metal parts, we feel obliged to warn you about the risk of injury.
Instructions:
1. Disconnect the luminaire from the mains by pulling the plug from the power outlet.
2. First, carefully remove the plastic cover on the broken joint and pull it over the supply line. (pictures 02-03)
3. Now, a lubricant, ideally a thin oil, such as penetrating oil should be applied onto the joint. Wait for the lubricant to spread and take effect. Depending on the lubricant, this might take a few moments. Please note the manufacturer's instructions.
4. Once the lubricant takes effect, the broken and stuck joint can be loosened by means of suitable tools (pliers and hammer) and if possible by two people. We recommend protecting the remaining parts of the luminaire against damage by appropriate padding (cloth/foil). In order to remove the broken joint, one person should hold the luminaire's lower arm. Then, the other person has to grip the broken joint with a pair of water pump pliers (or a similar tool) and hit down on the pliers with a hammer parallel to the lamp arm to drive the broken piece out of the aluminium arm. Hitting from different angles prevents the joint from tilting inside the aluminium arm. Depending on the age of the lamp and the staining inside the lamp arm, removing the broken joint requires a different amount of hits. Therefore, some patience is needed in removing the joint. (pictures 04-07)
5. After releasing the joint from the aluminium arm, you will see that it is still attached to a spring that is part of the Tolomeo rope pull system. In order to detach the joint from the spring, you need to move the joint transversely to the spring loop and lever the hook with the aid of a small screwdriver. Alternatively, you can easily bend the retaining loop of the spring using a pair of pointed pliers or a small screwdriver to release the spring from the joint. (Picture 08-10)
6. Now, you can attach the new joint to the spring. To do so, press the loop at the end of the spring onto the end piece of the joint. (pictures 11-13)
7. Then insert the spring, including the new joint, into the lamp arm. (pictures 14-15)
8. In order to fix the new joint inside the lamp arm, a large screwdriver, a hammer and some force is required. The large screwdriver is placed on the bridge between the two rings at the end of the joint. Now carefully hit the end of the screwdriver with a hammer to drive the joint into the aluminium lamp arm. Here as well, you should work with a partner. (pictures 16-17 - next page)
9. Now place the previously removed plastic cover back into the cable feed. (picture 18)
10. The next step is to reconnect the new joint to the lower lever. For this, you have to screw the new joint and the angled joint, which later connects the lamp arm to the base, together. Make sure that the holes and rings are congruent to each other. The two washers need to be positioned congruently between the two joints. This might require some patience and sensitive fingers. Now guide the slotted screw through the rings and fix it with the adjusting knob.(pictures 19-23)
11. The rope can be fixed into place by hand or with the help of a pipe wrench. (pictures 24-27)
12. Once the rope is back in place, you can insert the lever into the corresponding holder on the lamp base. This may require some effort. If possible, carry out this step with the help of another person. (pictures 28-29)
13. As final step, the retaining screws of the Tolomeo joint must be firmly locked. Please do not forget to place the washers according to the pictures shown. (pictures 30-34)


